FREE: 10 Must-Know Tomato Growing Tips Get The Guide
Read our affiliate disclosure here.
What to Put on Bottom of Raised Garden Bed
Since 2010, Tomato Dirt has garnered 4.8+ million views, making it the web’s leading online source for growing tomatoes in the home garden. Award-winning writer and Tomato Dirt owner Kathy Widenhouse has helped thousands of home gardeners grow healthier tomatoes. Be one of them when you get Tomato Dirt’s Growing Guide here.
Updated 1.18.25
What to put on bottom of raised garden bed you’ve just built?
A raised bed is an elevated box that sits on top of your existing soil. Raised garden beds make it easier to prevent weeds and keep your garden area tidy. Raised beds allow you to grow plants closer together to get a higher yield. Since the beds are higher, they have better drainage. And raised beds generally mean less work because they take up less space than a garden plot. They’re a great option for home gardeners and beginner gardeners and for homeowners who don’t have a lot of yard space.
But any garden, whether it’s a plot or a container or a raised bed, is only worth its dirt.
A raised bed frame sits directly on the open ground. Before you fill the frame with a luscious mix of topsoil and compost, you need to prepare the ground beneath. What to put on the bottom of raised garden bed so the plot is productive for many years to come?
Three questions to ask as you prepare your raised bed soil
1. How should I prepare the soil below the raised bed line?
The above-ground bed contains only part of the growing medium. Equally important is the soil underneath it. A big mistake new raised bed owners make is to simply plop the structure on top of the ground and toss in new dirt.
You’ll have more success if you prepare the soil below the raised bed line. Many homegrown crops need 36-48 inches in which to plunge their roots. Tomatoes, in particular, have deep root systems. Even if your raised bed has sides that are 12-36 inches high, they need soil depth below the surface to allow their roots to spread and grow.
Use a garden hose or chalk line to outline the area where you will place the structure. Then till or spade the soil inside the outline. Cultivate the bed 10-12 inches deep or more using a garden spade or tiller/cultivator. Remove debris. Break up soil clods.
Once you’ve worked the “under” soil, take a soil test – either through your local extension or by using a home soil test kit. The results show which nutrients that are plentiful in the soil and which ones are deficient. Amend the lower layer of raised bed soil accordingly before you place a weed barrier and add a soil mixture to the upper bed.
2. What do I put on bottom of raised garden bed?
A raised bed is a box with sides but no bottom. Should your raised garden bed have a bottom layer like concrete blocks or wood planks? No. Plants need to dig their roots down deeply into the soil.
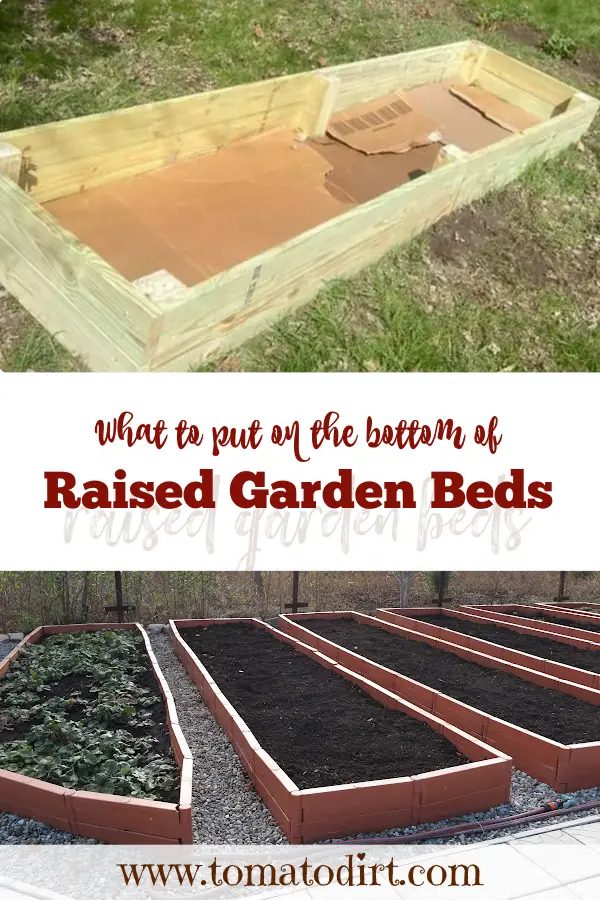
However, you want to create a weed barrier on the lower part of a raised garden bed. This will reduce the number of weeds that spring up in your new raised garden.
Two options are best.
1. Landscape fabric. Landscape fabric is made specifically for gardens and raised beds. Weed barrier fabric is durable and prevents weeds from springing up from the depths of the soil beneath the structure.
Choose a fabric weed barrier carefully. Many are not biodegradable. That means they’ll need to be replaced about every 5-10 years, depending on quality, weather conditions, and general wear and tear. Make sure the landscape cloth allows for water to flow freely on both its topside and bottom side.
Alternatively, you could choose a biodegradable weed barrier, which is made from materials like paper, jute, or burlap.
2. Cardboard or newspaper. If your budget doesn’t allow for weed barrier cloth, line your raised bed with several layers of cardboard or newspaper. These break down in 4-6 months and like biodegradable weed barrier, add organic material to the soil. Be sure to use newsprint only (no glossy inserts). If using cardboard, strip away tape and plastic-coated labels before laying pieces on the bottom of the raised bed.
3. What’s the best raised bed soil mix?
Once you’ve worked the soil below the structure’s sides, fill your raised bed with a light, well-drained soil mixture. Most raised bed soil recipes are variations on a 3-part theme: 1/3 topsoil, 1/3 compost and 1/3 peat moss, coconut fiber, or coarse sand. You can add the components directly to the raised bed and mix them there or combine the three materials in a wheelbarrow and fill the bed that way.
A few extra tips for what to put on bottom of raised garden bed
Should you put gravel in the bottom of your raised garden bed?
No. Typically, you add gravel or other drainage material to the bottom of a planter or container to help with drainage. A raised bed sits on top of soil. It may appear to be a container because it is elevated, but the sides of the raised bed simply extend the actual garden space vertically. Tomatoes and other crops extend their roots downward, into the soil. That’s why preparing the soil for a raised bed is so important.
If you’ve properly prepared the soil beneath the raised bed, you should have good drainage without gravel. In fact, gravel or rocks in the lower part of the bed may actually hinder your tomato crop. The soil directly above the gravel will act as a sponge and retain water. Too much moisture means your raised bed tomatoes and other crops may get waterlogged.
Should you put wood chips in bottom of raised garden beds?
That’s another no. Fresh wood chips can draw a lot of nitrogen from the soil. Nitrogen encourages leaf growth, which tomatoes and other crops need – particularly at the beginning of growing season when plants are working hard to get established and put out foliage. Your plants need nitrogen to get off to a good start. Wood chips leach that nutrient out of the soil.
Plus, wood chips break down quickly … and unevenly. That means the soil in your raised bed will develop sink holes.
Should you put black plastic in bottom of raised garden beds?
Nope. Black plastic is okay for the surface of the garden (although not the optimum weed barrier) as long as you leave room around tomato plant stems for moisture. But if you line a raised bed with plastic, you’ll inadvertently create a barrier that roots and water can’t penetrate. Your “raised bed” will act like a container or planter instead.
How to fill a raise bed cheap
Cultivate 10-12 to the under soil and you can add a few free items to your raised bed for no cost: sticks, kitchen scraps, grass clippings, shredded leaves, and larger pieces of wood. The fancy name for this approach is hügelkultur (HEW-gul-culture), a German term that translates as “hill gardening.” The lasagna-like layers decay over time, leaving a rich bed of organic matter beneath the surface of your raised bed.
Central to hügelkultur success? Large sticks or logs in the debris you bury deep in the soil, which continue to decay over a long period of time.
Once your growing season is over, be sure to remove spent plants from your raised bed and add a surface layer of organic matter to break down over winter. Your raised bed soil will continue to improve. And you’ll get another prolific raised crop the following season.
More Raised Bed Gardening Tips
8 Low Cost Raised Garden Beds You Can DIY ...
16 Cost-Saving Tips for Do-It-Yourself Raised Garden Beds ...
7 Benefits of Raised Beds for Gardening ...
6 Tips for Growing Tomatoes In Raised Garden Beds ...
Starting a Raised Bed Vegetable Garden FAQs ...
Materials for Your Raised Garden Bed: a primer ...
8 Guidelines for Growing Raised Bed Tomatoes ...
Raised Bed Gardening ideas on our Pinterest board ...
Return from What to Put on Bottom of Raised Garden Bed to Tomato Dirt home
As an Amazon Associate and Rakuten Advertising affiliate I earn from qualifying purchases.
SHARE THIS PAGE:
FREE! 10 Must-Know Tomato Growing Tips: 20-page guide
Get yours here:


